| | |
|---|
| | | * **OpenCV 2.4.9**: https://sourceforge.net/projects/opencvlibrary/files/opencv-win/2.4.9/opencv-2.4.9.exe/download |
|---|
| | | - To compile without OpenCV - remove define OPENCV from: Visual Studio->Project->Properties->C/C++->Preprocessor |
|---|
| | | - To compile with different OpenCV version - change in file yolo.c each string look like **#pragma comment(lib, "opencv_core249.lib")** from 249 to required version. |
|---|
| | | - With OpenCV will show image or video detection in window |
|---|
| | | - With OpenCV will show image or video detection in window and store result to: test_dnn_out.avi |
|---|
| | | |
|---|
| | | ##### Pre-trained models for different cfg-files can be downloaded from (smaller -> faster & lower quality): |
|---|
| | | * `yolo.cfg` (256 MB) - require 4 GB GPU-RAM: http://pjreddie.com/media/files/yolo-voc.weights |
|---|
| | | * `yolo-tiny.cfg` (60 MB) - require 1 GB GPU-RAM: http://pjreddie.com/media/files/tiny-yolo-voc.weights |
|---|
| | | * `yolo.cfg` (256 MB COCO-model) - require 4 GB GPU-RAM: http://pjreddie.com/media/files/yolo.weights |
|---|
| | | * `yolo-voc.cfg` (256 MB VOC-model) - require 4 GB GPU-RAM: http://pjreddie.com/media/files/yolo-voc.weights |
|---|
| | | * `tiny-yolo.cfg` (60 MB COCO-model) - require 1 GB GPU-RAM: http://pjreddie.com/media/files/tiny-yolo.weights |
|---|
| | | * `tiny-yolo-voc.cfg` (60 MB VOC-model) - require 1 GB GPU-RAM: http://pjreddie.com/media/files/tiny-yolo-voc.weights |
|---|
| | | |
|---|
| | | Put it near compiled: darknet.exe |
|---|
| | | |
|---|
| | | You can get cfg-files by path: `darknet/cfg/` |
|---|
| | | |
|---|
| | | ##### Examples of results: |
|---|
| | | |
|---|
| | | [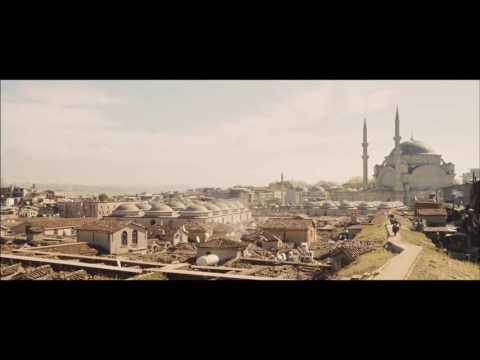](https://www.youtube.com/watch?v=VOC3huqHrss "Everything Is AWESOME") |
|---|
| | |
|---|
| | | |
|---|
| | | ##### Example of usage in cmd-files from `build\darknet\x64\`: |
|---|
| | | |
|---|
| | | * `darknet_demo_voc.cmd` - initialization with 256 MB model yolo-voc.weights & yolo-voc.cfg and play your video file which you must rename to: test.mp4 |
|---|
| | | * `darknet_net_cam_voc.cmd` - initialization with 256 MB model, play video from network video-camera mjpeg-stream (also from you phone) |
|---|
| | | * `darknet_voc.cmd` - initialization with 256 MB VOC-model yolo-voc.weights & yolo-voc.cfg and waiting for entering the name of the image file |
|---|
| | | * `darknet_demo_voc.cmd` - initialization with 256 MB VOC-model yolo-voc.weights & yolo-voc.cfg and play your video file which you must rename to: test.mp4, and store result to: test_dnn_out.avi |
|---|
| | | * `darknet_net_cam_voc.cmd` - initialization with 256 MB VOC-model, play video from network video-camera mjpeg-stream (also from you phone) and store result to: test_dnn_out.avi |
|---|
| | | * `darknet_web_cam_voc.cmd` - initialization with 256 MB VOC-model, play video from Web-Camera number #0 and store result to: test_dnn_out.avi |
|---|
| | | |
|---|
| | | How to use from command line with 256 MB model: `darknet.exe yolo demo yolo-voc.cfg yolo-voc.weights test.mp4 -i 0` |
|---|
| | | ##### How to use on the command line: |
|---|
| | | * 256 MB COCO-model - image: `darknet.exe detector test data/coco.data yolo.cfg yolo.weights -i 0 -thresh 0.2` |
|---|
| | | * Alternative method 256 MB COCO-model - image: `darknet.exe detect yolo.cfg yolo.weights -i 0 -thresh 0.2` |
|---|
| | | * 256 MB VOC-model - image: `darknet.exe detector test data/voc.data yolo-voc.cfg yolo-voc.weights -i 0` |
|---|
| | | * 256 MB COCO-model - video: `darknet.exe detector demo data/coco.data yolo.cfg yolo.weights test.mp4 -i 0` |
|---|
| | | * 256 MB VOC-model - video: `darknet.exe detector demo data/voc.data yolo-voc.cfg yolo-voc.weights test.mp4 -i 0` |
|---|
| | | * Alternative method 256 MB VOC-model - video: `darknet.exe yolo demo yolo-voc.cfg yolo-voc.weights test.mp4 -i 0` |
|---|
| | | * 60 MB VOC-model for video: `darknet.exe detector demo data/voc.data tiny-yolo-voc.cfg tiny-yolo-voc.weights test.mp4 -i 0` |
|---|
| | | * 256 MB COCO-model for net-videocam - Smart WebCam: `darknet.exe detector demo data/coco.data yolo.cfg yolo.weights http://192.168.0.80:8080/video?dummy=param.mjpg -i 0` |
|---|
| | | * 256 MB VOC-model for net-videocam - Smart WebCam: `darknet.exe detector demo data/voc.data yolo-voc.cfg yolo-voc.weights http://192.168.0.80:8080/video?dummy=param.mjpg -i 0` |
|---|
| | | * 256 MB VOC-model - WebCamera #0: `darknet.exe detector demo data/voc.data yolo-voc.cfg yolo-voc.weights -c 0` |
|---|
| | | |
|---|
| | | ##### For using network video-camera mjpeg-stream with any Android smartphone: |
|---|
| | | |
|---|
| | |
|---|
| | | 3. Start Smart WebCam on your phone |
|---|
| | | 4. Replace the address below, on shown in the phone application (Smart WebCam) and launch: |
|---|
| | | |
|---|
| | | ``` |
|---|
| | | darknet.exe yolo demo yolo-voc.cfg yolo-voc.weights http://192.168.0.80:8080/video?dummy=param.mjpg -i 0 |
|---|
| | | ``` |
|---|
| | | |
|---|
| | | ##### How to use COCO instead of VOC: |
|---|
| | | |
|---|
| | | * Get synset names from `build\darknet\x64\data\coco.names`: https://github.com/AlexeyAB/darknet/blob/master/build/darknet/x64/data/coco.names |
|---|
| | | * And change list `char *voc_names[] = ` to COCO-names in file `yolo.c`: https://github.com/AlexeyAB/darknet/blob/master/src/yolo.c#L30 |
|---|
| | | * 256 MB COCO-model: `darknet.exe detector demo data/coco.data yolo.cfg yolo.weights http://192.168.0.80:8080/video?dummy=param.mjpg -i 0` |
|---|
| | | * 256 MB VOC-model: `darknet.exe detector demo data/voc.data yolo-voc.cfg yolo-voc.weights http://192.168.0.80:8080/video?dummy=param.mjpg -i 0` |
|---|
| | | |
|---|
| | | |
|---|
| | | ### How to compile: |
|---|
| | | |
|---|
| | | 1. If you have CUDA 8.0, OpenCV 2.4.9 (C:\opencv_2.4.9) and MSVS 2015 then start MSVS, open `yolo-windows\build\darknet\darknet.sln` and do the: Build -> Build darknet |
|---|
| | | 1. If you have CUDA 8.0, OpenCV 2.4.9 (C:\opencv_2.4.9) and MSVS 2015 then start MSVS, open `build\darknet\darknet.sln` and do the: Build -> Build darknet |
|---|
| | | |
|---|
| | | 2. If you have other version of CUDA (not 8.0) then open `darknet\build\darknet\darknet.vcxproj` by using Notepad, find 2 places with "CUDA 8.0" and change it to your CUDA-version, then do step 1 |
|---|
| | | 2. If you have other version of CUDA (not 8.0) then open `build\darknet\darknet.vcxproj` by using Notepad, find 2 places with "CUDA 8.0" and change it to your CUDA-version, then do step 1 |
|---|
| | | |
|---|
| | | 3. If you have other version of OpenCV 2.4.x (not 2.4.9) then you should change pathes after `\darknet.sln` is opened |
|---|
| | | |
|---|
| | |
|---|
| | | |
|---|
| | | `C:\opencv_2.4.9\opencv\build\include;..\..\3rdparty\include;%(AdditionalIncludeDirectories);$(CudaToolkitIncludeDir);$(cudnn)\include` |
|---|
| | | - right click on project -> Build dependecies -> Build Customizations -> set check on CUDA 8.0 or what version you have - for example as here: http://devblogs.nvidia.com/parallelforall/wp-content/uploads/2015/01/VS2013-R-5.jpg |
|---|
| | | - add to project all .c & .cu files from yolo-windows\src |
|---|
| | | - add to project all .c & .cu files from `\src` |
|---|
| | | - (right click on project) -> properties -> Linker -> General -> Additional Library Directories, put here: |
|---|
| | | |
|---|
| | | `C:\opencv_2.4.9\opencv\build\x64\vc12\lib;$(CUDA_PATH)lib\$(PlatformName);$(cudnn)\lib\x64;%(AdditionalLibraryDirectories)` |
|---|
| | |
|---|
| | | - (right click on project) -> properties -> C/C++ -> Preprocessor -> Preprocessor Definitions |
|---|
| | | |
|---|
| | | `OPENCV;_TIMESPEC_DEFINED;_CRT_SECURE_NO_WARNINGS;GPU;WIN32;NDEBUG;_CONSOLE;_LIB;%(PreprocessorDefinitions)` |
|---|
| | | - compile to .exe (X64 & Release) and put .dll`s near with .exe: |
|---|
| | | - compile to .exe (X64 & Release) and put .dll-s near with .exe: |
|---|
| | | |
|---|
| | | `pthreadVC2.dll, pthreadGC2.dll` from yolo-windows\3rdparty\dll\x64 |
|---|
| | | `pthreadVC2.dll, pthreadGC2.dll` from \3rdparty\dll\x64 |
|---|
| | | |
|---|
| | | `cusolver64_80.dll, curand64_80.dll, cudart64_80.dll, cublas64_80.dll` - 80 for CUDA 8.0 or your version, from C:\Program Files\NVIDIA GPU Computing Toolkit\CUDA\v8.0\bin |
|---|
| | | |
|---|
| | | |
|---|
| | | ## How to train (Pascal VOC Data): |
|---|
| | | |
|---|
| | | 1. Download pre-trained weights for the convolutional layers (76 MB): http://pjreddie.com/media/files/darknet19_448.conv.23 and put to the directory `build\darknet\x64` |
|---|
| | | |
|---|
| | | 2. Download The Pascal VOC Data and unpack it to directory `build\darknet\x64\data\voc`: http://pjreddie.com/projects/pascal-voc-dataset-mirror/ will be created file `voc_label.py` and `\VOCdevkit\` dir |
|---|
| | | |
|---|
| | | 3. Download and install Python for Windows: https://www.python.org/ftp/python/3.5.2/python-3.5.2-amd64.exe |
|---|
| | | |
|---|
| | | 4. Run command: `python build\darknet\x64\data\voc\voc_label.py` (to generate files: 2007_test.txt, 2007_train.txt, 2007_val.txt, 2012_train.txt, 2012_val.txt) |
|---|
| | | |
|---|
| | | 5. Run command: `type 2007_train.txt 2007_val.txt 2012_*.txt > train.txt` |
|---|
| | | |
|---|
| | | 6. Start training by using `train_voc.cmd` or by using the command line: `darknet.exe detector train data/voc.data yolo-voc.cfg darknet19_448.conv.23` |
|---|
| | | |
|---|
| | | If required change pathes in the file `build\darknet\x64\data\voc.data` |
|---|
| | | |
|---|
| | | More information about training by the link: http://pjreddie.com/darknet/yolo/#train-voc |
|---|
| | | |
|---|
| | | ## How to train with multi-GPU: |
|---|
| | | |
|---|
| | | 1. Train it first on 1 GPU for like 1000 iterations: `darknet.exe detector train data/voc.data yolo-voc.cfg darknet19_448.conv.23` |
|---|
| | | |
|---|
| | | 2. Then stop and by using partially-trained model `/backup/yolo-voc_1000.weights` run training with multigpu (up to 4 GPUs): `darknet.exe detector train data/voc.data yolo-voc.cfg yolo-voc_1000.weights -gpus 0,1,2,3` |
|---|
| | | |
|---|
| | | https://groups.google.com/d/msg/darknet/NbJqonJBTSY/Te5PfIpuCAAJ |
|---|
| | | |
|---|
| | | ## How to train (to detect your custom objects): |
|---|
| | | |
|---|
| | | 1. Create file `yolo-obj.cfg` with the same content as in `yolo-voc.cfg` (or copy `yolo-voc.cfg` to `yolo-obj.cfg)` and: |
|---|
| | | |
|---|
| | | * change line `classes=20` to your number of objects |
|---|
| | | * change line `filters=425` to `filters=(classes + 5)*5` (generally this depends on the `num` and `coords`, i.e. equal to `(classes + coords + 1)*num`) |
|---|
| | | |
|---|
| | | For example, for 2 objects, your file `yolo-obj.cfg` should differ from `yolo-voc.cfg` in such lines: |
|---|
| | | |
|---|
| | | ``` |
|---|
| | | [convolutional] |
|---|
| | | filters=35 |
|---|
| | | |
|---|
| | | [region] |
|---|
| | | classes=2 |
|---|
| | | ``` |
|---|
| | | |
|---|
| | | 2. Create file `obj.names` in the directory `build\darknet\x64\data\`, with objects names - each in new line |
|---|
| | | |
|---|
| | | 3. Create file `obj.data` in the directory `build\darknet\x64\data\`, containing (where **classes = number of objects**): |
|---|
| | | |
|---|
| | | ``` |
|---|
| | | classes= 2 |
|---|
| | | train = train.txt |
|---|
| | | valid = test.txt |
|---|
| | | names = obj.names |
|---|
| | | backup = backup/ |
|---|
| | | ``` |
|---|
| | | |
|---|
| | | 4. Put image-files (.jpg) of your objects in the directory `build\darknet\x64\data\obj\` |
|---|
| | | |
|---|
| | | 5. Create `.txt`-file for each `.jpg`-image-file - with the same name, but with `.txt`-extension, and put to file: object number and object coordinates on this image, for each object in new line: `<object-class> <x> <y> <width> <height>` |
|---|
| | | |
|---|
| | | Where: |
|---|
| | | * `<object-class>` - integer number of object from `0` to `(classes-1)` |
|---|
| | | * `<x> <y> <width> <height>` - float values relative to width and height of image, it can be equal from 0.0 to 1.0 |
|---|
| | | * atention: `<x> <y>` - are center of rectangle (are not top-left corner) |
|---|
| | | |
|---|
| | | For example for `img1.jpg` you should create `img1.txt` containing: |
|---|
| | | |
|---|
| | | ``` |
|---|
| | | 1 0.716797 0.395833 0.216406 0.147222 |
|---|
| | | 0 0.687109 0.379167 0.255469 0.158333 |
|---|
| | | 1 0.420312 0.395833 0.140625 0.166667 |
|---|
| | | ``` |
|---|
| | | |
|---|
| | | 6. Create file `train.txt` in directory `build\darknet\x64\data\`, with filenames of your images, each filename in new line, with path relative to `darknet.exe`, for example containing: |
|---|
| | | |
|---|
| | | ``` |
|---|
| | | data/obj/img1.jpg |
|---|
| | | data/obj/img2.jpg |
|---|
| | | data/obj/img3.jpg |
|---|
| | | ``` |
|---|
| | | |
|---|
| | | 7. Download pre-trained weights for the convolutional layers (76 MB): http://pjreddie.com/media/files/darknet19_448.conv.23 and put to the directory `build\darknet\x64` |
|---|
| | | |
|---|
| | | 8. Start training by using the command line: `darknet.exe detector train data/obj.data yolo-obj.cfg darknet19_448.conv.23` |
|---|
| | | |
|---|
| | | |
|---|
| | | ## How to mark bounded boxes of objects and create annotation files: |
|---|
| | | |
|---|
| | | Here you can find repository with GUI-software for marking bounded boxes of objects and generating annotation files for Yolo v2: https://github.com/AlexeyAB/Yolo_mark |
|---|
| | | |
|---|
| | | With example of: `train.txt`, `obj.names`, `obj.data`, `yolo-obj.cfg`, `air`1-6`.txt`, `bird`1-4`.txt` for 2 classes of objects (air, bird) and `train_obj.cmd` with example how to train this image-set with Yolo v2 |
|---|

